Master Your Edges: An Expert's Guide to Choosing and Using Edge Control Gel
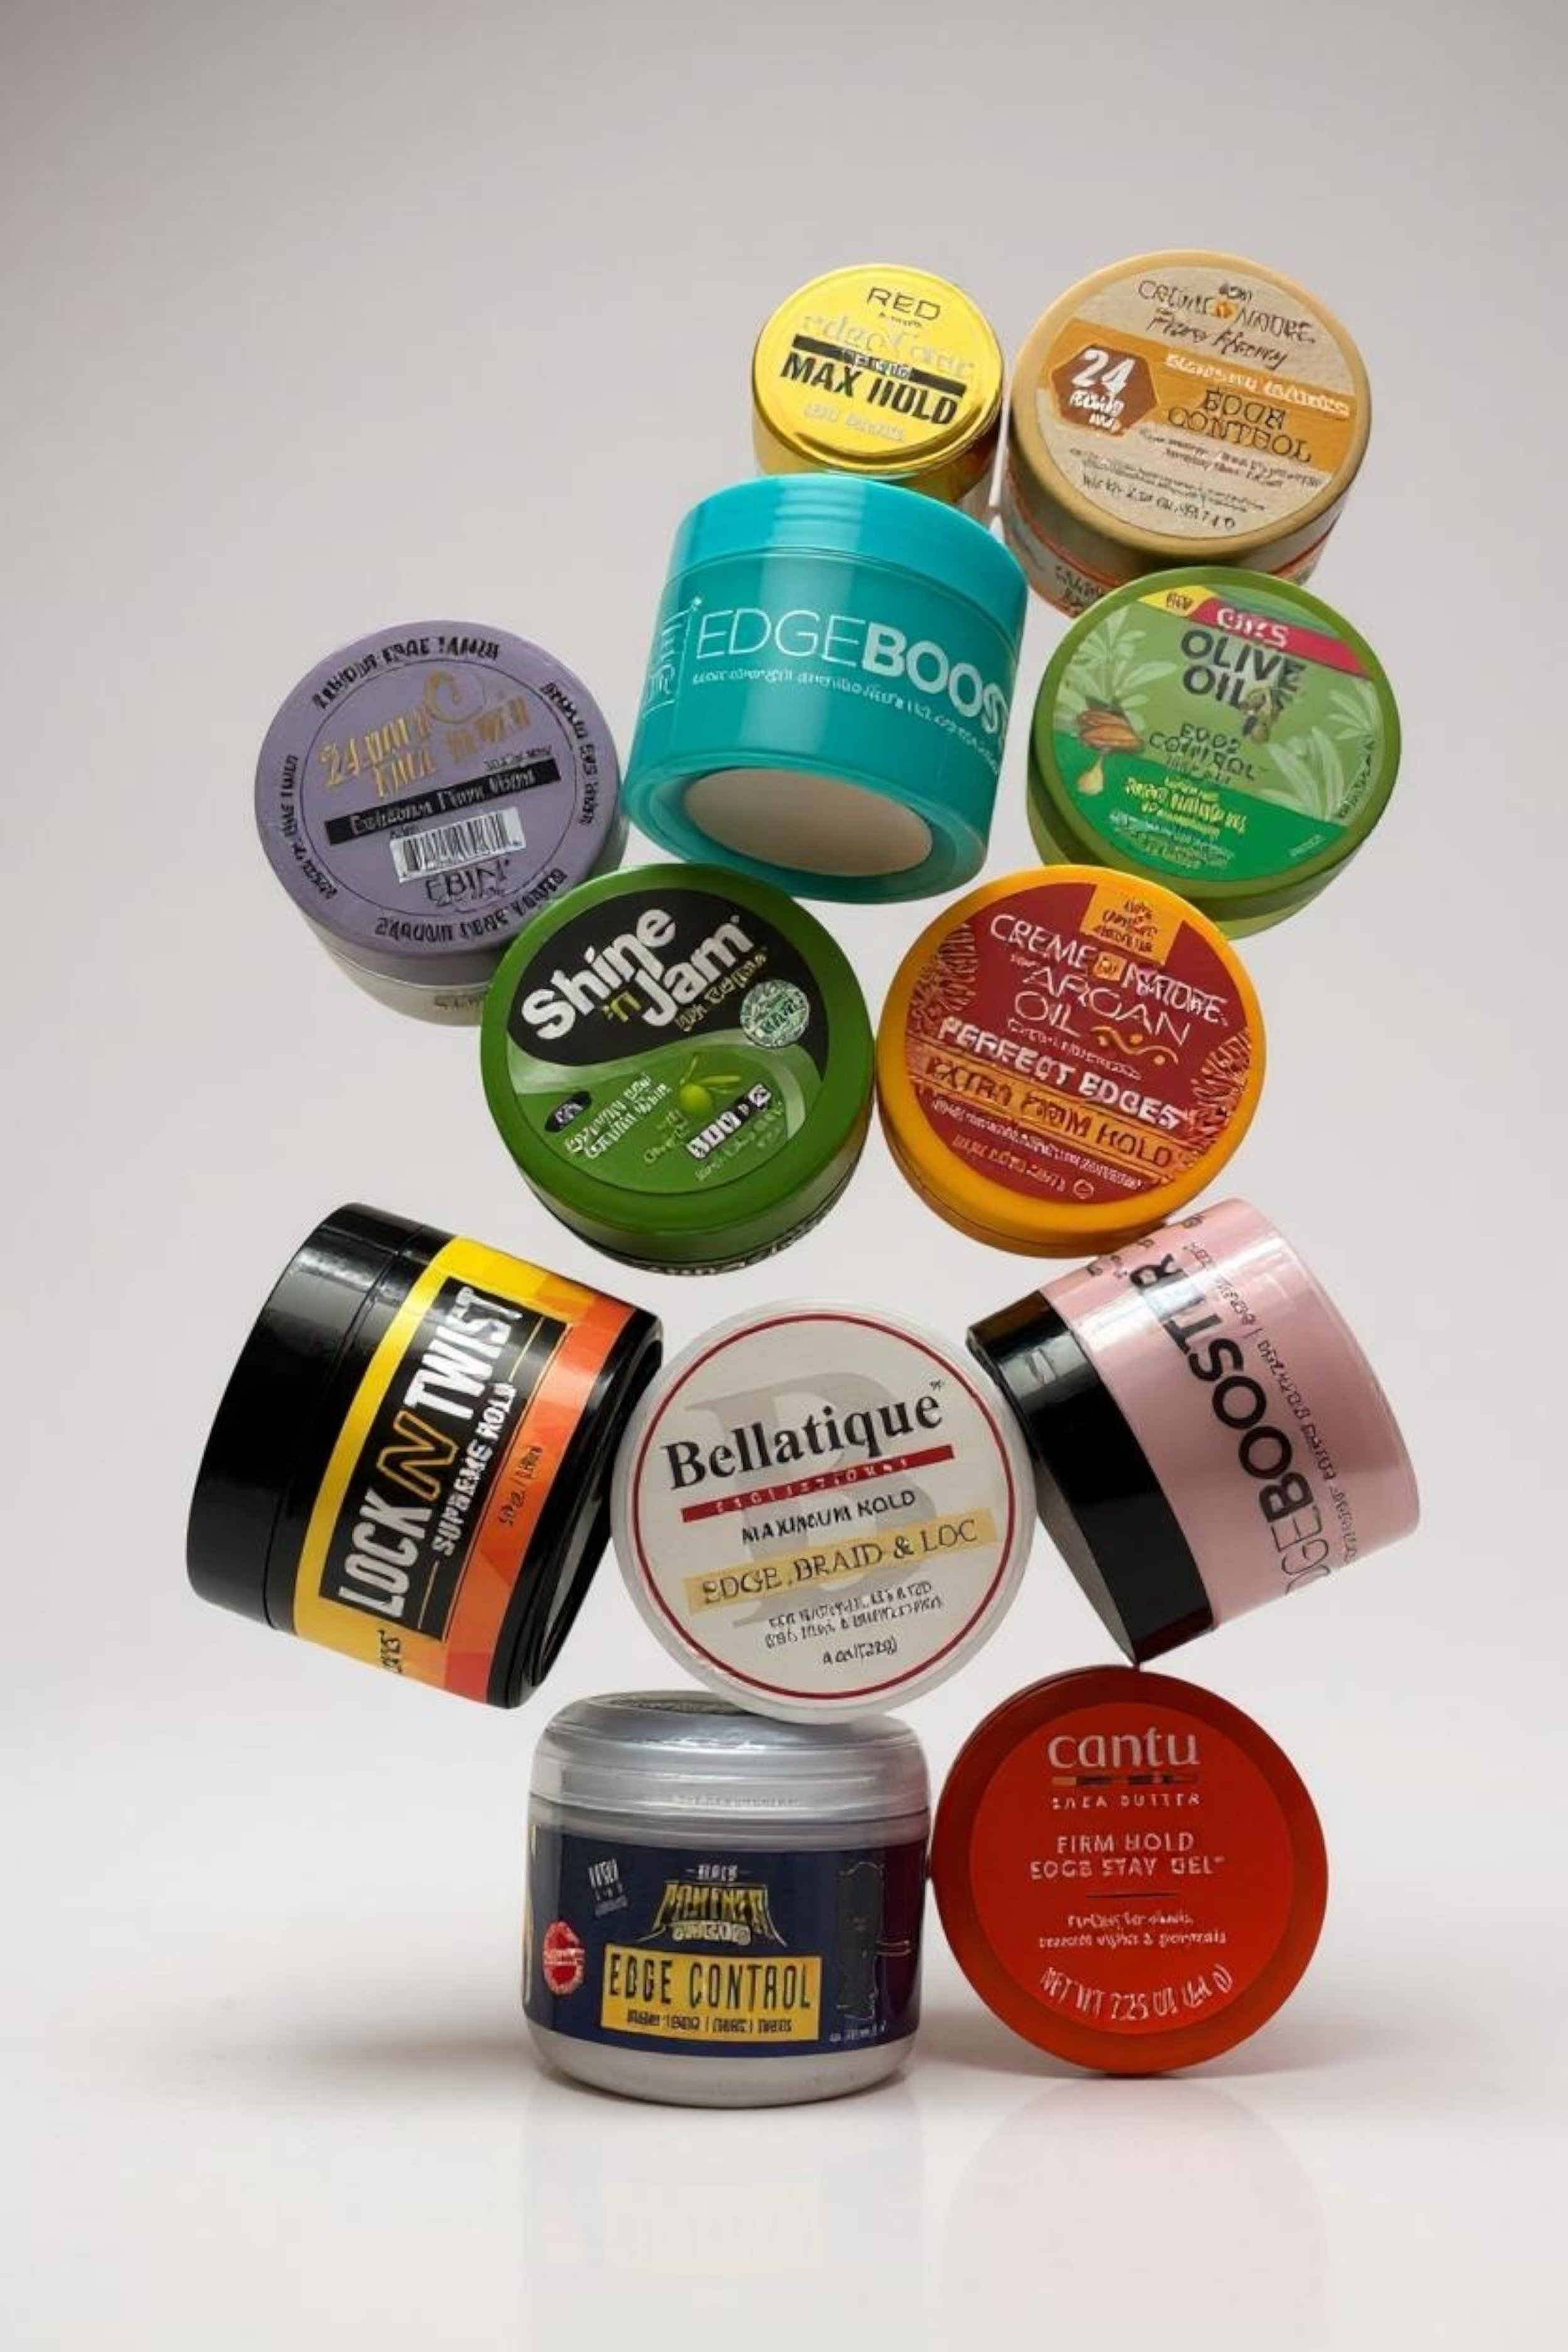
Here at The Beauty Supply Warehouse, we understand that the perfect hairstyle is in the details. And when it comes to sleek ponytails, flawless braids, or laid baby hairs, nothing is more crucial than a great edge control gel. With dozens of formulas on our shelves, from cult classics to new, innovative brands, finding your perfect match can be overwhelming—but it doesn't have to be.
Why Edge Control is a Game-Changer
Edge control gels are specifically designed to tame and shape the fine, delicate hairs around your hairline. Unlike regular gels, which can flake, turn white, or feel overly stiff, a high-quality edge control offers superior hold with a natural, glossy finish. It’s the secret weapon for achieving that "glass" look and ensuring your style stays pristine all day.
Finding Your Perfect Match at The Beauty Supply Warehouse
With dozens of options to choose from, the key is to know what you're looking for. Here’s a quick breakdown to help you navigate our aisles:
* For Maximum Hold & High-Shine Finish: Look for thick, creamy formulas. These are ideal for stubborn, coarse hair that needs extra power to lay down.
* For a Soft, Natural Hold: If you prefer a more flexible feel with less shine, opt for lighter gels or pomades. These are great for a more subtle, day-to-day look.
* For Sensitive Scalps: Always check the ingredients. We carry a wide selection of water-based, alcohol-free, and all-natural formulas that are gentle on the scalp and won't cause irritation.
Don't hesitate to ask our staff for a recommendation! We can help you find a product based on your hair type and desired finish.
Expert Tips for Flawless Application
A great product is only half the battle; technique is everything. Follow these pro tips for salon-perfect edges every time.
1. Prep is Key
Start with clean, moisturized edges. Apply a small amount of a lightweight oil (like jojoba or argan) or a leave-in conditioner to damp hair. This provides a smooth base and prevents the gel from drying out your hair.
2. Use the Right Tools
Your fingers are your best tool for initial application, allowing you to warm up the product and really work it into the hair. For the final sleekness, always use a soft-bristle brush (like a toothbrush or a dedicated edge brush) and a satin scarf or durag.
3. The Application Process
* Scoop a small amount of gel onto your finger—a little goes a long way!
* Apply evenly to your edges, making sure each hair is coated.
* Brush with tension. Use your edge brush to smooth the hair in the direction you want it to lay. Apply firm, consistent pressure.
* Tie it down. Immediately after brushing, wrap your edges with a satin scarf.
* Let it set. Allow the gel to dry completely under the scarf for at least 5-15 minutes. For the strongest hold, you can even use a blow dryer on a low, cool setting over the scarf for a minute.
4. Avoid Common Mistakes
* Over-applying: Too much product leads to flaking and a heavy, crispy feel.
* Brushing Dry Hair: Always ensure your hair is slightly damp or prepped with oil before applying gel.
* Skipping the Scarf: The scarf is non-negotiable for locking in that smooth, flat look.
Your journey to perfect edges starts now. With the largest selection in town and expert advice on tap, The Beauty Supply Warehouse is your one-stop shop for all your edge control needs.

Summer 2025 Lipstick Trends: Ready to Slay
Move over, basic nudes—Summer 2025 is here to burn the beauty rulebook. This season, lips are dialing up the drama with unapologetic hues, futuristic finishes, and a dash of retro flair. Whether you’re sipping rosé on a rooftop or dancing under neon lights, your pout deserves to steal the spotlight. Buckle up, buttercup—we’re diving into the juiciest lipstick trends that’ll make your makeup bag scream “icon status.”
Solar Flare Orange: Catch Rays, Not Fades
This isn’t your grandma’s coral. Solar Flare Orange is a neon, traffic-stopping hue that screams, “I woke up like this…on Mars.” Inspired by sunset vibes and post-pandemic optimism, this electric shade pairs perfectly with bronzed skin and a zero-efforts-given attitude. Pro tip: Keep the rest of your makeup minimal—let your lips do the talking (or shouting). Pair it with gold highlighter for a literal glow-up. Brands like Fenty and Pat McGrath are already bottling this fiery energy, so get ready to blaze trails.
Cyber Coral: The Metallic Middle Child We Stan
Meet Cyber Coral, the lovechild of Barbie pink and molten lava. This metallic-meets-matte hybrid has a holographic sheen that’s giving “I hacked the Matrix” vibes. Perfect for clubbing or your next Zoom meeting (camera on, always), it’s a futuristic twist on classic summer brightness. Swipe it on with a lip liner for extra definition, or go rogue and smudge it for a just-kissed-a-robot look. Bonus: It’s almost as luminous as your personality.
Midnight Margarita: Green with Envy (In a Good Way)
Who said green lips are just for Halloween? Midnight Margarita—a deep, shimmering emerald with a teal undertone—is the moody, mysterious trend your nightlife routine craves. Channel your inner mermaid or villainess (why not both?) with this edgy shade. Layer it over a black base for added depth, or keep it sheer for a sultry stain. Sustainable brands like Axiology and Ilia are crafting eco-friendly versions, so you can save the planet and slay the party.
Blush Bash: Nude, But Make It Cool
For the minimalists who still want to flex, Blush Bash is your new BFF. Think ’90s brown lipstick got a Gen-Z makeover—muted terracotta, dusty rose, and toasted almond tones that whisper, “I’m effortlessly chic.” These creamy, buildable shades are perfect with dewy skin and a slicked-back bun. Throw on some gloss for day-to-night versatility. It’s the ”no-makeup” makeup look…if your no-makeup look involved 10 products and a TikTok tutorial.
Gloss Boss: High-Shine, Higher Vibes
Glossy lips are back, baby—and they’re stickier than ever. Gloss Boss celebrates the Y2K revival with clear, high-shine formulas in juicy shades like cherry cola, frosted peach, and even clear with rainbow glitter. The messier, the better. Dab it in the center of your lips for a plump effect, or layer it over matte colors for dimension. Just pray it doesn’t get stuck in your hair (worth it).
The Takeaway: Paint the Town…Whatever Color You Want
Summer 2025 is all about choice. Mix metallics with mattes, pair neon orange with a smoky eye, or rock green lips at brunch—because rules are so 2019. Your lips, your canvas. So grab that bold shade, channel your inner superstar, and remember: Confidence is always the trendiest color in the room.
Now go forth, darling, and pout like the world’s watching. (Spoiler: It is.)

When to Replace Your Makeup
Your Ultimate Guide to Makeup Care & When to Say Goodbye!
Hey beauty lovers! Let’s talk about the VIPs in your vanity: your makeup BFFs. Just like friendships, your favorite products need a little TLC to keep the magic alive—and sometimes, a gentle "it’s not you, it’s me" breakup. Ready to keep your glam game strong and safe? Let’s spill the tea on makeup shelf lives and care tips!
1. Mascara: The Lash Lifter
Care Tips:
- Never share (germs love wand-swapping!).
- Store it upright to avoid clumps.
- Pump responsibly—twist the wand, don’t pump air (which dries it out).
Expiration Date Alert: 3–6 months.
When to toss: If it smells like a science experiment or your lashes look spider-leg crunchy.
2. Foundation: The Skin Whisperer
Care Tips:
- Keep the bottle closed tight to avoid oxidation (no one likes orange face syndrome).
- Wash your hands before dipping in—or use a spatula.
- Store away from sunlight (it’s not a sunflower).
Expiration Date Alert: 6–12 months.
When to toss: Separation anxiety (oil pooling), weird odor, or patchy application.
3. Lipstick & Gloss: The Pout Party
Care Tips:
- Wipe tips after use to avoid bacteria buildup.
- Keep caps on—dust bunnies aren’t cute.
- Chill bullet lipsticks if they melt (RIP summer car rides).
Expiry Alert:
- Bullets: 1–2 years.
- Glosses: 6–12 months (stickier = faster expiry).
When to toss: If it tastes funky or looks drier than your sense of humor.
4. Eyeshadow & Eyeliner: The Eye Candy
Care Tips:
- Sanitize powders with rubbing alcohol spritzes.
- Sharpen pencils regularly (a dull tip = raccoon eyes).
- Close palettes tight—no one wants fallout confetti.
Expiration Date Alert:
- Powders: 2+ years (if well-kept).
- Creams/Liners: 6–12 months.
When to toss: Crumbling, mold, or irritation (itchy eyes ≠ vibes).
5. Brushes & Sponges: The Unsung Heroes
Care Tips:
- Wash weekly with gentle soap (dirty tools = breakout city).
- Dry brushes upside-down to keep shape.
- Replace sponges often—they’re bacteria sponges (literally).
Expiration Date Alert:
- Brushes: 1–5 years (handle shedding = retirement time).
- Sponges: 1–3 months.
Pro Tips to Slay Safely
- Label your products with purchase dates (phone reminders = genius).
- When in doubt, throw it out—your skin will thank you.
- Invest in storage:
- Cool, dry spots > humid bathrooms.
- Travel cases for on-the-go glam.
Final Glossy Thought: Treating your makeup right means fewer breakouts, more flawless moments, and a vanity that’s aesthetic and safe. So, declutter that crusty eyeliner, hug your faves, and keep slaying responsibly!

Getting Wiggy
Your Step-by-Step Guide to Flawless Lace Front Magic! ✨💁♀️"
Hey, glam squad! Ready to slay a whole new look in minutes? Whether you’re a wig newbie or a hair chameleon looking to level up, lace front wigs are your secret weapon for instant transformation. But let’s keep it real: applying one can feel like rocket science if you’re unprepared. Fear not! We’re breaking it down with all the deets (and zero stress). Let’s get that Beyoncé-level hair flip ready!
Your Wig Squad: The Must-Have Supplies
Before we dive in, gather these wig BFFs:
1. The Star of the Show: A lace front wig (duh!). Opt for HD lace if you want that undetectable, “Is that her real hair?!” vibe.
2. Scalp Prep Crew: Rubbing alcohol or witch hazel to cleanse your skin. Oily scalp? Not today!
3. Sticky Situation Pros: Adhesive (wig glue, tape, or spray). Sensitive skin? Go for hypoallergenic options!
4. Edge Control MVP: A soft-bristle brush (or toothbrush!) and edge control gel for baby hairs.
5. Snip Snip: Sharp scissors to trim excess lace. Precision = perfection.
6. Comfort Zone: A wig cap that matches your scalp tone. No peeking edges!
7. Optional Oomph: Concealer (to blend the lace) and a blow dryer (to melt that adhesive).
Step 1: Prep Like a Pro
- Wash your face and hairline with a gentle cleanser. Dry completely.
- Swipe rubbing alcohol on your forehead and edges to banish oils. Your wig glue will thank you later.
- Pop on a wig cap, smoothing down every bump. Braid or flatten your hair underneath for a seamless base.
Step 2: Fit & Trim
- Place the wig on your head without glue first. Adjust the straps inside for a snug fit.
- Trim the excess lace (leave ¼ inch!) with scissors. Go slow—this isn’t a race!
Step 3: Glue with Gusto
- Apply a thin layer of adhesive along your hairline. Pro tip: Use a cotton swab for precision!
- Let it get tacky (30-60 seconds). Channel your inner Pat McGrath and blow-dry for extra hold.
- Carefully lay the wig’s lace onto the glue, starting at the front. Press down gently with a microfiber cloth.
Step 4: Baby Hair Boss
- Brush your natural edges (or the wig’s baby hairs) with edge control. Sculpt swoops, curls, or waves—get creative!
Step 5: Blend, Blend, Blend
- Dab a bit of concealer on the lace to match your skin tone. Set with translucent powder. Voilà—invisible hairline!
Pro Tips for Wig Perfection
- Less is more: Over-gluing = crunchy hairline. Keep it light!
- Practice makes fierce: Try the wig on a few times before committing.
- Nighttime TLC: Remove glue with oil-based makeup remover. Your scalp deserves love!
Final Reveal: Werk It, Queen!
You’re officially a lace front wizard! Throw on some hoops, swipe on lip gloss, and strut like the main character you are. Whether you’re rocking waist-length mermaid waves or a sassy bob, remember: confidence is your best accessory.

Nail Envy

Your Cheeky Guide to Flawless Fake Nails That Actually Stay Put"
Hey glam squad! Tired of your fab fake nails pulling a Houdini and vanishing after one latte sip? We’ve all been there—crying over a lost bedazzled nail in the parking lot. But fear not! Today, we’re spilling the tea on how to glue nails like a pro and keep them slaying for weeks. Let’s dive in!
Step 1: Prep Like a Boss
Your natural nails are the VIP lounge for your falsies—keep ‘em clean and cozy!
- Buff & Shine: Gently buff your nails to remove shine (think of it as roughing up a dance floor for better grip).
- Soak It Up: Swipe nails with acetone or alcohol to banish oils. No slippery surfaces allowed!
- Size Matters: Fit each fake nail like Cinderella’s slipper. Too big? Trim it. Too small? Side-eye it and grab another.
Step 2: Glue Game Strong
Time to channel your inner nail surgeon. Precision is key!
- Less Is More: A teeny droplet of glue in the center of your nail—no Niagara Falls here! Pro tip: Use a toothpick for control.
- Avoid Skin-tastrophes: Glue on skin = ouch city. Keep it tidy! If you slip, acetone is your BFF.
- Press & Manifest: Place the fake nail near your cuticle, then firmly press down for 10-15 seconds. Channel your inner zen master—meditate on that hold!
Step 3: Lock It In
Celebrate… but not too fast! Seal the deal:
- Avoid H2O: No dishes, showers, or pool parties for 2 hours. Let that glue cure like fine art.
Pro Tips to Make ’Em Last
Your nails deserve longevity!
1. Moisturize (But Not the Nails!): Keep cuticles hydrated with oil, but avoid the nail bed—grease is the enemy of grip!
2. Gloves Are Goddess: Washing dishes? Gardening? Rock rubber gloves. Your nails aren’t tools!
3. Touch-Ups FTW: Notice a lift? Dab a tiny glue drop under the edge and clamp it down. Crisis averted!
4. Be Gentle: Stop using nails as box openers. They’re art, not crowbars!
When to Say Goodbye
Even Beyoncé takes breaks. After 2 weeks, give your nails a breather. Soak ’em off with acetone, moisturize, and repeat the magic when you’re ready!
Final Thought: Fake nails are like confetti—fun, fierce, and meant to last! With these tricks, you’ll be flipping your glittery tips without fear. Now go forth and glue like the queen you are!